
Saturday, August 3, 2013
Dark Angels Space Marine
Here's a little test model I did for my new Dark Angels. I'm quite happy about the results, 9 more to do to finish the squad!


Friday, November 9, 2012
My Ogres - 1st Ogre Bull!
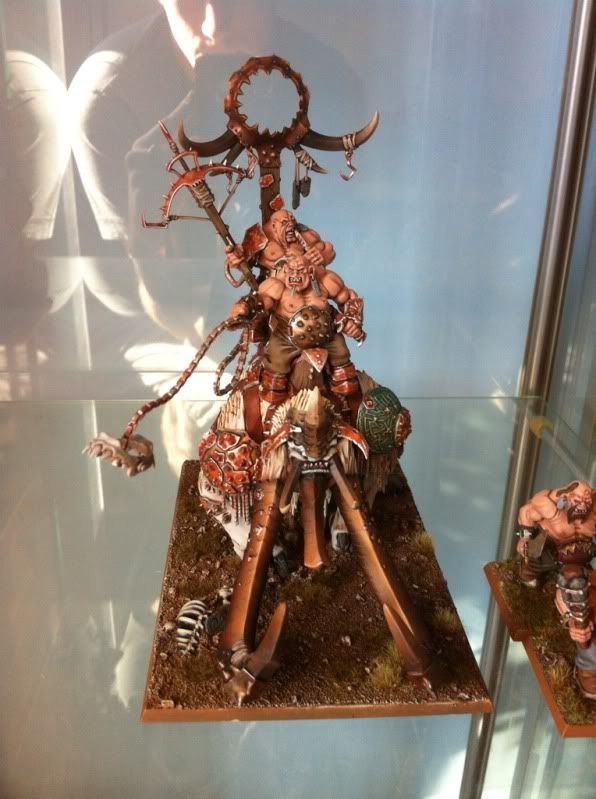
So I've recently started an Ogre Kingdom army and I must say that painting these guys is a blast! Since your army is so small, you can spend more time on individual models and for me, that's a blessing since I get bored of painting 5 models at a time. With each model being more individual, I can put a lot more time and effort in a single model and I think it's helping me improve as a painter.
 I'm really happy with how my 1st model came out and I hope to keep improving as I keep painting these guys. I've already learned a lot from painting this one so hopefully, the quality of my painting will get better with each ogre!!!

Friday, October 19, 2012
Elsewhere on the Web - High Elf army

Amazing is the word that came out when I saw Ptolemy's army with display board over at Ulthuan.net. The army itself is very well painted and has some amazing pieces, but his new display board is simply stunning. You should definitely head over to his thread over at Ulthuan.net and take a good look at his creative and amazing work! You will also be able to see his old display board, which was really nice as well, and a lot of shots of the units on the board from various angles.
This blog is coming back to life!
Hey guys, it's been a long while since I've posted anything. As a matter of fact, it has been a long while since I've done anything hobby related but that has changed in the past month.
I've decided to set aside my Lizards for some time and decided to start a Ogre Kingdoms army. Since my brother decided to get into Warhammer Fantasy with an High Elf army, I decided to start something new with him and we'll be running an escalation campaign with some friends.
That being said, I've assembled the army (1000 pts so far) and started painting again. I'll be doing these guys one by one as I only have around 20 models in the list at the moment. I'm just waiting on my camera to start posting WIP pictures and start feeding this blog once more.
On other news, I'll also start posting random updates of hobby related things so keep an eye out on this blog!
Sunday, December 11, 2011
My Lizards - Salamander and an update
I finished painting my salamander and I'm really happy with how it look! I still need to do some work on the base but the model itself is done.


I've now started a Warmachine Khador army. It will be the main focus of my painting time over the holidays, as it will make a nice change from the Lizards!
Expect some updates with the 1st Khadoran Warjack of my army in the next couple of days!!


I've now started a Warmachine Khador army. It will be the main focus of my painting time over the holidays, as it will make a nice change from the Lizards!
Expect some updates with the 1st Khadoran Warjack of my army in the next couple of days!!
Monday, November 14, 2011
My Lizards - Some updates with a sneak peak
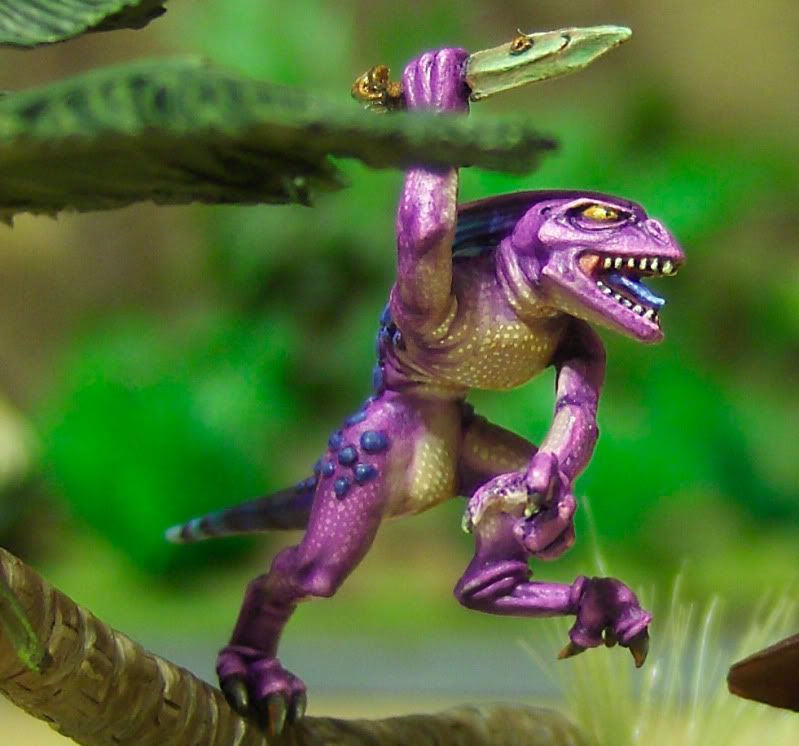
I've been working on my army in the past few days and I've made some progress. I have now almost completed the two front ranks of my unit of 25 Saurus Warriors. Expect some photos in the near future. I've also been doing some conversion work. I'm not a fan of the GW's Chameleon Skinks models. It's also really expensive to get 10 of them so I decided to make my own using some regular Skink Skirmisher models and some green stuff (from then on referred to as GS). I've never sculpted anything with GS before so this has been a learning experience for me. I've came up with 10 Chameleon Skinks that have a different look and that will distinguish themselves even more with the color scheme they will receive.
 This little fellow was the last model I did. I only had 8 blowpipes left (stupid battalion box that comes with 12 skinks but only 10 blowpipes) so I had to make 2 custom made blowpipes. I used a javelin, took out the spear tip before adding some GS work. I wanted the blowpipe to have some kind of creeper vine on it and I like how it came out. Once primed, most of the stuff that bothers the eye on the GS is gone and your left with some decent looking Chameleon Skinks!
 I've also bought a Temple of Skulls piece of terrain during the week-end. I'm working on making it look like a Lizardmen ruin and I've already finished working on the obelisks. I just need to sculpt a new hilltop to replace the Chaos sign that is usually there. I'll post pictures once I file some mould lines.
There's a lot to expect in the next couple of days/weeks so stay tuned for more!


There's a lot to expect in the next couple of days/weeks so stay tuned for more!
Wednesday, November 9, 2011
Elsewhere on the Web - Some more Lizardmen!


As for my own work, I've made some progress on my Saurus Warriors and even started some skin work on the Saurus Scar-Veteran/Oldblood on foot model I have (the old metal one). Nothing worthy of an update yet but soon I hope!!!
Sunday, November 6, 2011
Elsewhere on the Web - Krull from Maelstrom & some more Ogre Kingdoms

First of all, I'll say it now... I'm speechless... This miniature (well, it's so big I'm not even sure we can call it that) is simply amazing, stunning, beautiful, you name it!!! The pose is great, the looks, everything from the model is just ... Perfect ! Use it as a Bloodthirster and you'll have one really imposing centerpiece for your army. To see more shots of this model and of all the awesome stuff Maelstrom has to offer, click here.

Ogre Kingdoms is an army with so many beautiful models that it's hard not to thinking about picking up some of them for the pure fun of painting them. Looking at what Kay did with his army over at Ogre Stronghold, it's even harder!!!! Pure eye candy! Click here to see more of his impressive work.
As for my own stuff, I'm working on a unit of Saurus Warriors, I'm making slow progress and I'm hoping to have the completed unit (19 models plus a unit filler of 6) done (with the magnetized movement tray finished) before Christmas. Hopefully, I'll post some updates before that, maybe once I'm done with the command group or the 1st rank. Stay tuned!
Saturday, October 29, 2011
Elsewhere on the Web - High Elves & Paintingtabled.com
First of all, let's see some High Elves. On Swordmaster of Hoeth's painting log on the website Ulthuan.net, you'll find some really well painted classic High Elves models.
 I used to own 10 similar archers but I ended up throwing them to the garbage before I learned you could actually remove paint on models... Such a shame since those models are great looking and Swordmaster of Hoeth did a great job on those guys.
 I've always been a little pissed at my older brother when he sold his 5 classic Ellyrian Reavers. He also sold a classic Eltharion the Grim on Stormwing, one of my favourite models of all time... Anyways, once again, Swordmaster of Hoeth really did justice to those miniatures by painting them to a very high standard. If you are a High Elves fan or if you appreciate well painted classics, I invite you to check out Swordmaster of Hoeth's plog here.
I found out about that podcast a couple of month ago and I've been enjoying every minute of it. They have very interesting views on gaming and also provide advice about the hobby. Check out their website to find out more and listen to all their episodes.


I found out about that podcast a couple of month ago and I've been enjoying every minute of it. They have very interesting views on gaming and also provide advice about the hobby. Check out their website to find out more and listen to all their episodes.
Wednesday, October 26, 2011
Hobby News - Skullvane Manse

Tuesday, October 25, 2011
Elsewhere on the Web - Ogre Kingdoms & Lizardmen
I found this very cool plog on Ogre Stronghold. This Thunderstusk is really good looking and the painter, dreadboi, has some very cool looking stuff there. Find out more about his work here.

I'm a big fan of that Stegadon painted by Agrem of the Lustria-Online website. He chose a color scheme with rich and warm colors and he really pulled it together!!! Find out more about Agrem's work on his plog here!
Wednesday, October 19, 2011
Hobby Item Review - Battlefoam 432 Army Case
 Here is a Hobby Item Review about the Battlefoam 432 Army Case, a very good product! Let's see why

 The good: First of all, the price is really decent at 100$. In this particular model, I can safely pack my 2400 Lizardmen army, including a Stegadon and a Slann Mage-Priest. The 432 offers a very good price/models ratio. Another thing I liked about the 432 is that it comes with 3 modular trays of different thickness ( 1 inch 2 inches and 3 inches respectively). All you need is to pluck out some foam to make properly sized spaces where your miniatures will go. It's almost as much fun as popping bubbles on bubble paper. The 432 also has 3
pockets on the front. The 2 smaller will be useful to carry your dice and the bigger one will let you safely pack your army book and your rulebook (the IoB version, not the regular one).The bandolier lets you carry the case easily and while it's a cheap one, it does what it's supposed to do! Last but not least, the 432 is supposed to be conform to carry on luggage regulation in the US. Very useful if you are traveling with your miniatures.
The bad: There is nothing really bad about the 432 but there are some things worth mentionning. First, when you are plucking the foam out of the trays, TAKE YOUR TIME!!! Sometimes, one piece of foam you didn't want to pluck will come out if you are not careful. Use a hobby knife and be patient. The other thing that bothers me a bit it the color of the model I bought. I usually don't worry about that stuff but Army Olive Green looks pretty bad. Makes me want to puke... But whatever, even though the 432 I bought might look like crap, it certainly isn't!!! I just wished it looked good!
Dimensions:
Height: 13 inches
Width: 16 1/2 inches
Depth: 8 1/2 inches
Rating: 4,5/5
Final comment: A really really good product that unfortunatly isn't pretty.
Company Link: http://www.battlefoam.com/

Sunday, August 21, 2011
Tutorial - Skirmisher movement tray

Skirmisher movement tray tutorial with pictures


Step 1: First of all, in 8th edition of WHFB, skirmishers adopt a loose rank formation where they stand roughly 1/2 inch apart. I considered that a made a bigger than normal movement tray for a unit of 10 20mm based models. I made sure I'd have a gap of roughly 1/2 inch between each model and each rank. I then used my pencil and ruler to draw the surface of my movement tray on the carboard. Then I used the scissors to cut it and made sure it would fit tightly in the movement tray.
Step 2: Using the 20mm base and my ruler, I used my pencil to draw each model's base on my piece of cardboard. I made sure I had roughly 1/2 inch between each base.

Step 3: Using my scissors, I cut each base so I would be left with a piece of carboard looking like the one on the next picture. I had to make 3 such pieces and glue them together to have a thick enough piece of carboard for my movement tray but that really depends on the thickness of your cardboard.

Step 4: The piece of carboard was then glued to the movement tray and primed black. I then gave a basecoat of Gnarla Green (P3 color) to the piece of cardboard.

Step 5: Finally, I used some static grass and white glue to completly flock the base. You can see an overview of the finished skirmisher base on the next picture.

As you can see, every model fits tightly and you still have lots of place on the base to add to the basing. You could add plants, trees or even make a scenic skirmisher base, depending on how skilled you are! I hope you enjoyed this little tutorial and that it gave you some ideas.
Sunday, August 7, 2011
Skink Skirmishers

Saurus Warrior Test Model


The model was fairly quick to paint and only required some very basic techniques. The model was first undercoated with GW's Chaos Black Primer. The skin was then given a Knarloc Green basecoat followed by a Thraka Green wash. I then highlighted some parts of the skin. For the scales, I used a Coal Black (P3 color) basecoat, followed by a Badab Black wash. I then drybrushed the scales Codex Grey and finished them with a very light drybrush of Space Wolves Grey. The bones and teeth were painted in the same fashion. I gave them a Khemri Brown basecoat followed by a Devlan Mud wash. I then highlighted those parts Jack Bone (P3 equivalent of Bleached Bone) and continued highlighting adding some white into the mix. I then gave a final wash of Devlan Mud to tie it all together. The shield was first given a basecoat of Scab Red, followed by a Badab Black wash. I then used a mix of Scab Red and Blood Red to repaint the scales, making sure to leave the recessed area free of new paint. I then progressively highlighted each scale adding some Khador Red Highlight (P3 color equivalent to Fiery Orange) into the previous Scab Red/Blood Red mix.
I'm still working on the bronze, as I'm not very satisfied with how the weapon looks as of now. Once I figure it all out, I'll share my recipe with you all!
I really hope you guys enjoyed this first post, I'm very eager to read your comments!
Subscribe to:
Posts (Atom)